Showing posts with label [Red Line]. Show all posts

Sunday, September 14, 2008

[Image] Stuka attack on the 2/24th.

30th April, 1941. Tobruk, Libya.

Stuka's bomb the 2/24th in the Red Line.

This amazing photo was taken from within a Carrier of the 2/48th Infantry Battalion as they approached the Red Line to offer assistance to the entrenched 2/24th. This attack was the second major thrust made by Rommel during the Siege and was heavily supported by artillery, tanks and infantry. The ever present Luftwaffe added the icing to the cake presented to the Diggers by their relentless dive bombing of the Red Line positions.

The Luftwaffe's aerial bombing was an attempt to demoralise the Australians and more importantly keep them underground in their Red Line posts whilst tanks and supporting infantry moved up to favourable positions in front of the anti-tank ditch.

This battle signalled the beginning of a period of bloody fighting that developed into the Battle of the Salient. This was one of the most trying and costly actions of the entire defense of Tobruk, for both sides.

The Carrier in the above photo has a Boys Anti-Tank Gun mounted in the forward gun position, the barrel of which can be seen protruding from the front of the photo. Also other tracks can be seen in the desert surface in front of the Carrier's direction of travel. These are most likely tracks from other Australian Carriers as opposed to Axis Tank tracks. The Axis tanks were a this stage of the battle concentrated to the front of the Red Line and not further back where this photo was taken.

No men were killed by the Stuka's bombs this day but on the day after this photo was taken 32 men from the 2/24th Infantry Battalion were killed in action in the Red Line.

image 128989 Australian War Memorial.

Saturday, September 6, 2008

[Image] 2/13th goes through the wire at R27.

8th September, 1941. Tobruk, Libya.

Men of the 2/13th go through the wire.

These two men of the 2/13th are preparing to go through the wire on a small patrol out from post R27 in the Red Line. On the left holding Lee-Enfield .303 rifle with fixed bayonet is NX36511 Sgt. William F. Kubank. To his right is NX36399 Pvt. Stanley C. Hutton with the Thompson submachinegun.

Post R27 in the Red Line is opposite the El-Adem Escarpment, behind which camped the Afrika Korps. The low ground in front of the escarpment was covered extensively by German machine gun posts but these were regularly monitored and dealt with by nocturnal patrols into no-man's land.

image 020784 Australian War Memorial.

[Image] Tracers at Twilight.

August, 1941. Tobruk Libya.

9th Division Bren Gunner opens fire at dusk.

With the glow of their illumination lighting their flight path these tracer bullets leave a visible sign of their passage at night as they rapidly pepper the German lines a mere 400 yards away.

This photo was taken during a fierce exchange of machine gun fire between the Aussies and the Germans on the Red Line. Twilight was a preferred time for attacks and counter-attacks as the dying light reduced the effectiveness of both machine guns and artillery. Tracer rounds assisted gunners in aiming their fire at night as they could see the path of their bullets. Problem is so could everyone else.

image 009492/14 Australian War Memorial.

[Image] Wounded 2/23rd patrol returns

17th September, 1941. Tobruk, Libya.

2/23rd Patrol returns through the wire.

This patrol from the 2/23rd Battalion returns through a gap in the wire in their Red Line posts. At this time the 2/23rd had just relieved the 2/48th the night before in their positions on the Western salient.

This seven man patrol returns with two wounded. One carried on a collapsible stretcher the other with a bandaged thigh wound is carried by a mate piggy back style. Casualties in this part of Tobruk were high.

image 020669 Australian War Memorial.

[Image] RAAF foils a Red Line Raid

1941. Tobruk, Libya.

Red Line positions get strafed.

A German Luftwaffe Messerschmitt BF109 Fighter strafes 9th Division front line posts with it's three mounted machine guns raising up clouds of dust and sand as the bullets impact the ground.

Little did this pilot know that his actions were noticed by one of the few Australian RAAF pilots who were still operational in the area who dropped in on him and shot him from the sky to the cheers and applause of the infantry in the Red Line.

I think the above photo is amazing in that it is evidence of the low altitude that the German pilots would drop to in order to have a final parting shot at the entrenched infantry. I have read accounts from members of the 2/17th Infantry Battalion that stated that they were often strafed by fast low flying German's at altitudes as low as 100 feet (approximately 30 metres for the metrically inclined).

They would often have a last parting shot at the infantry after supporting dive bombers on their attack run over the harbour and then follow the El Adem road to the safety of the escarpment and the German lines. If damaged these planes would make an all out last ditch effort to put down beyond the Red Line. Some made it, some didn't. Often the same pilots would strafe the same positions at the same time each day and would make 4 or 5 passes then tip their wings and wave at their intended targets before escaping for another try.

This one was unfortunately caught short by a rare allied fighter. The Luftwaffe certainly had unprecedented air superiority in the Western Desert in 1941. One wonders with 10 German fighters for ever 1 Allied one (at best) if some Luftwaffe pilots would be a little overconfident about their chances.


One less Messerschmitt to worry about.

images 010852 and 010843 Australian War Memorial.

Friday, September 5, 2008

[Image] A Rat in a Hole

August, 1941. Tobruk, Libya.

A Rat in a Red Line hole.

Pvt. J. Collins escapes from German shelling in his doover. Pvt. Collins has been able to scrounge wood and metal to brace the walls and roof of his hole in the ground. Men spent incredible lengths of time laying about in holes just like these. It was not uncommon to have to lie in your slit trench all day in blistering heat with little water, having to relieve yourself in a old fruit tin, any movement above the surface would draw the fire of the Germans.

Pvt. Collins has letters from home in the rafters of his shelter. This is obviously a more long term doover, as one would construct during an extended period in the front lines. This photo was taken during a German artillery attack on Red Line positions. This would keep the Diggers underground for extended periods in cramped, hot and dusty conditions. Depending on the time of the shelling men in the Red Line ran the risk of missing out on their one hot meal a day if the rations trucks were attacked.

image 009513 Australian War Memorial.
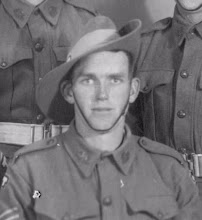
I have been unable to positively identify Pvt. J Collins as there were 217 men with that name that served in the Army during WW2. If time permits in the future I will attempt to make a positive identification.

Monday, September 1, 2008

[Image] Tommy got you covered

1st September, 1941. Tobruk, Libya.

VX31704 Cpl. Warwick Brownrigg & his Thompson.

VX31704 Cpl. W. Brownrigg aims his American made Thompson sub machine gun out a firing slot in the sandbag defences of his position in the Red Line of Tobruk's outer perimeter.

Cpl. Brownrigg, of the 2/23rd Infantry Battalion out of Victoria, featured in a number of photos taken at the time by members of the Military History and Information Unit. In this one he has a rare Tommy Gun with a larger 50 round drum magazine inserted. It also has the fore grip fitted, which with the added weight of the larger magazine made it a necessity for semi-accurate firing.

Cpl. Brownrigg is listed as having been discharged from the Army on 22nd October, 1942. As his service record has not been digitised by the National Archives I am unable to say for certain why. I suspect that his discharge date being so close to the date of the Second Battle of El Alamein that he may have been so severely wounded that he was not expected to be able to return to service and thus discharged. At this stage this is nothing more than an educated guess.

image 020503 Australian War Memorial.

Thursday, August 21, 2008

[Image] Tobruk's Anti Tank Ditch

1941. Tobruk, Libya.

The Red Line's Anti-Tank Ditch.

QX6167 Lieutenant William Spencer Beaney of the 9th Division Signals examines a stretch of the anti-tank ditch in the forward lines of the 2/48th Battalion positions. This ditch was originally constructed by the Italians in the 1930's but was never entirely completed.

Some sections of the ditch were over 15 feet deep yet other parts the ditch was as shallow as a couple of feet. The Australians completed what work they could with limited manpower and tools. The fact that the ditch was in the forward Red Line meant that it was also within range of the enemy. If any work was done on the ditch it was likely done at night under cover of darkness and out of the heat of the day.

This photo is great for not only the view of the ditch but the cross section of the wall of the ditch gives a great indication of what the land was like. Hard rock is visible all the way to the bottom of the ditch and this shows that digging anything in Tobruk was a hard slow process. I also love the vast flatness of the landscape here. You can see why strategic points like Hill 209 were so important to the outcome of the battles there.

image 020094 Australian War Memorial.

Friday, August 1, 2008

[Image] Inside a Rat of Tobruk's nest


Tobruk, Libya, July 1941.

In the dug out of the Officers of the 2/24th Battalion.

This heavily sandbagged weapons pit in the Red Line of Tobruk is temporary home to VX48780 Capt. G.G. Anderson and VX48694 Capt. G.I "Ian" Malloch M.C. of the 2/24th Infantry Battalion.

This weapons pit appears roomier than other examples seen with ordinary ranks. That aside it is very much a functional structure. The highly sandbagged walls protected the men from shell burst, machine gun and sniper fire, provided that they kept their heads below the level of the sandbags. Note between the Captains is a rectangular firing slot in the sandbags to allow for weapons fire through the protective wall. German snipers were know to shoot men through these holes at ranges of 400 yards. A Lee-Enfield .303 rifle stands against the wall in the foreground. Both men wear the standard commonwealth Tin Hat, but this time with hessian covers.

VX48694 Capt. George Ian Malloch M.C. (right) was awarded the Military Cross for "conspicuous gallantry and devotion to duty" at Tobruk on 17th May 1941 for leading a counter attack on a heavily defended German position above an escarpment about 50 metres high. Despite being shot 5 times in the arm, head, knee, thigh and hand and incapacitated he kept his calm and successful ordered his men from his fallen position. This resulted in the position being taken and saved the lives of many men. Staying calm in spite of grievous injuries and keeping on task set an example amongst the men of the 2/24th that filled them with pride to serve with such an officer.

VX48780 Capt. Graham Grantham Anderson (left) died of wounds (D.O.W) received in the first Battle of El-Alamein on 13th July, 1942. At the time of his death he was 23 years old. Capt. Anderson is memorialised at the Australian Roll of Honour here:


The National Archives of Australia has a completely digitised version of VX48694 Capt. G.I Malloch M.C.'s service record. Included in this is the originally submitted citation recommending him for the Military Cross (page 28 of record). View Capt. Malloch's Service Record here:


(Enter Capt. Malloch's service number "VX48694" in the key word field, hit "enter", then click on the "View digital copy" link.)


image p00237.036 Australian War Memorial.

[Image] Sgt. Jones' improvised banjo


Tobruk, Libya, 3rd September, 1941.

Sgt L Jones of the 2/23rd Battalion's improvised banjo.

Made whilst serving in the Red Line of Tobruk's outer perimeter this banjo was constructed by Sgt L. Jones of the 2/23rd Infantry Battalion out of an old kerosene tin and a packing case.

Australian troops in Tobruk faced shortages of most necessities and luxuries were virtually unheard of. Leave it to resourceful Aussie scroungers to make what they cant otherwise have. There was very little in the way of entertainment in the Red Line and the long monotonous times in the front could be made to pass quicker with a musical instrument.

There are numerous accounts that I have read of Australian troops in Tobruk playing musical instruments to the Germans. There was even one account of a soldier from the 2/13th Battalion playing German songs on his trumpet on the Salient causing the Germans to cease firing for as long as he played. Obviously things of small beauty in an ugly place caused even the Afrika Korps to pause for thought.

image 020566 Australian War Memorial.
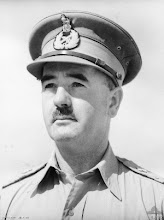
author's note: In keeping with my policy to try and identify by name and service number as many of the men as possible in photos I'm afraid I am unable at this time to identify the service number of Sgt. L Jones above. There were 323 men with the name L. Jones in the service of the Australian Army during the Second World War. Time permitting I will attempt to positively identify Sgt. Jones in the future.

[Map] Siege of Tobruk, 1941.

The Siege of Tobruk

Libya, 1941.

This is a map of Siege of Tobruk, as defended by the 9th Division, from April to November, 1941. You can see the both the Red and Blue lines as well as post numbers and dispositions of the Royal Horse Artillery guns.

Post R49, as discussed in the previous article "Post R49 Tobruk Explained" is located on the Red Line to the east of the El-Adem road. The locations of major battles is also shown.

Click on the image to expand it.


image from "The War, The Whores and the Afrika Korps". by NX34089 Cpl. Jack Barber, 2/17th Infantry Battalion, 1997, Kangaroo Press, Sydney.

Wednesday, July 30, 2008

[Image] 9th Division troops move From Blue to Red Line at Tobruk

Tobruk, Libya, 8th August, 1941.

9th Division troops move to relieve others in the Red Line.

This image shows unidentified troops of the Australian 9th Division moving on foot from the inner perimeter "Blue Line" to relieve others in positions in the front "Red Line" at Tobruk.

Troops coming off the front lines, where they had often been in close contact with the enemy for weeks, would fall back to take up positions in the inner defensive perimeter known as the "Blue Line". When Tobruk was originally taken from the Italians in January, 1941 by the men of the Australian 6th Division the English command wanted to set up the outer defenses in the area known as the Blue Line. Australian command argued that the outer Red Line should be the one to hold as to do so would place enemy artillery out of range of the vital supply point, Tobruk Harbour. That one decision alone could may well have changed the entire course of the war.


Had defenses been set up at the originally planned Blue Line, Rommel's artillery would have likely captured the city within days. With a deep water harbour secured Rommel could move forward with his plans to rapidly take Egypt and with it, a gateway to the rich Middle Eastern oil fields of Iraq. With unlimited supply of oil relatively close to the planned Eastern Front with Russia the whole shape of the war starts to look different.

What strikes me about this image of the Libyan desert is that fact that the landscape, if viewed through a red filter, reminds me of footage I've seen of the surface of Mars. Weird I know but those rock formations are like nothing I've seen on this planet.

image 041777 Australian War Memorial.

Monday, July 28, 2008

[Image] Post R49 Tobruk Explained

Post R49
Red Line Outer Defenses.
Tobruk, Libya, 1941.

This German aerial reconnaissance image shows the outer perimeter defenses at post R49. This post is one of those built in the early 1930's by the Italian occupation force. It consisted of concrete trenches and weapons pits, an anti-tank ditch and even a underground bunker for when you were under artillery fire. All this surrounded by miles of razor wire and fields of landmines.

The numbers in the picture refer to the following;

  1. Main anti-tank ditch
  2. Barbed Wire
  3. Barbed Wire
  4. Weapons pit with connecting trench and bomb-proof shelter
  5. Local anti-tank ditch
  6. Supply road

9th Division troops would occupy these posts for weeks on end. Some of the posts were within 400 yards of German lines and even raising your head two inches above the sandbags would draw intense fire from German snipers.

Days in the line would often be spent resting due to the intense heat and the lack of usable cover in the desert. Exposing yourself in daylight hours would often be fatal. In Tobruk, it was said that the Australians owned the night. Once the harsh African sun set it would be time for the nightly patrols to commence.

Patrols would leave posts like the above one pictured to venture thousands of yards beyond the wire to gather intelligence (usually by capturing prisoners for interrogation) or to destroy a known objective. At this activity the Australian's excelled.

image #44246L3 by Ullstein as scanned from "The Rats Remain - The Siege of Tobruk, 1941" by J.S. Cumpston, Grayflower Productions 1966.

Friday, July 25, 2008

[Image] 9th Division Bren Gunner at Tobruk.


This Bren Gunner of the 2/13th Infantry Battalion opens fire on German lines 400 yards away from his weapon pit in the Red Line of Tobruk.

image 009510 Australian War Memorial.