Showing posts with label [Artillery]. Show all posts

Friday, September 5, 2008

[Image] A Rat in a Hole

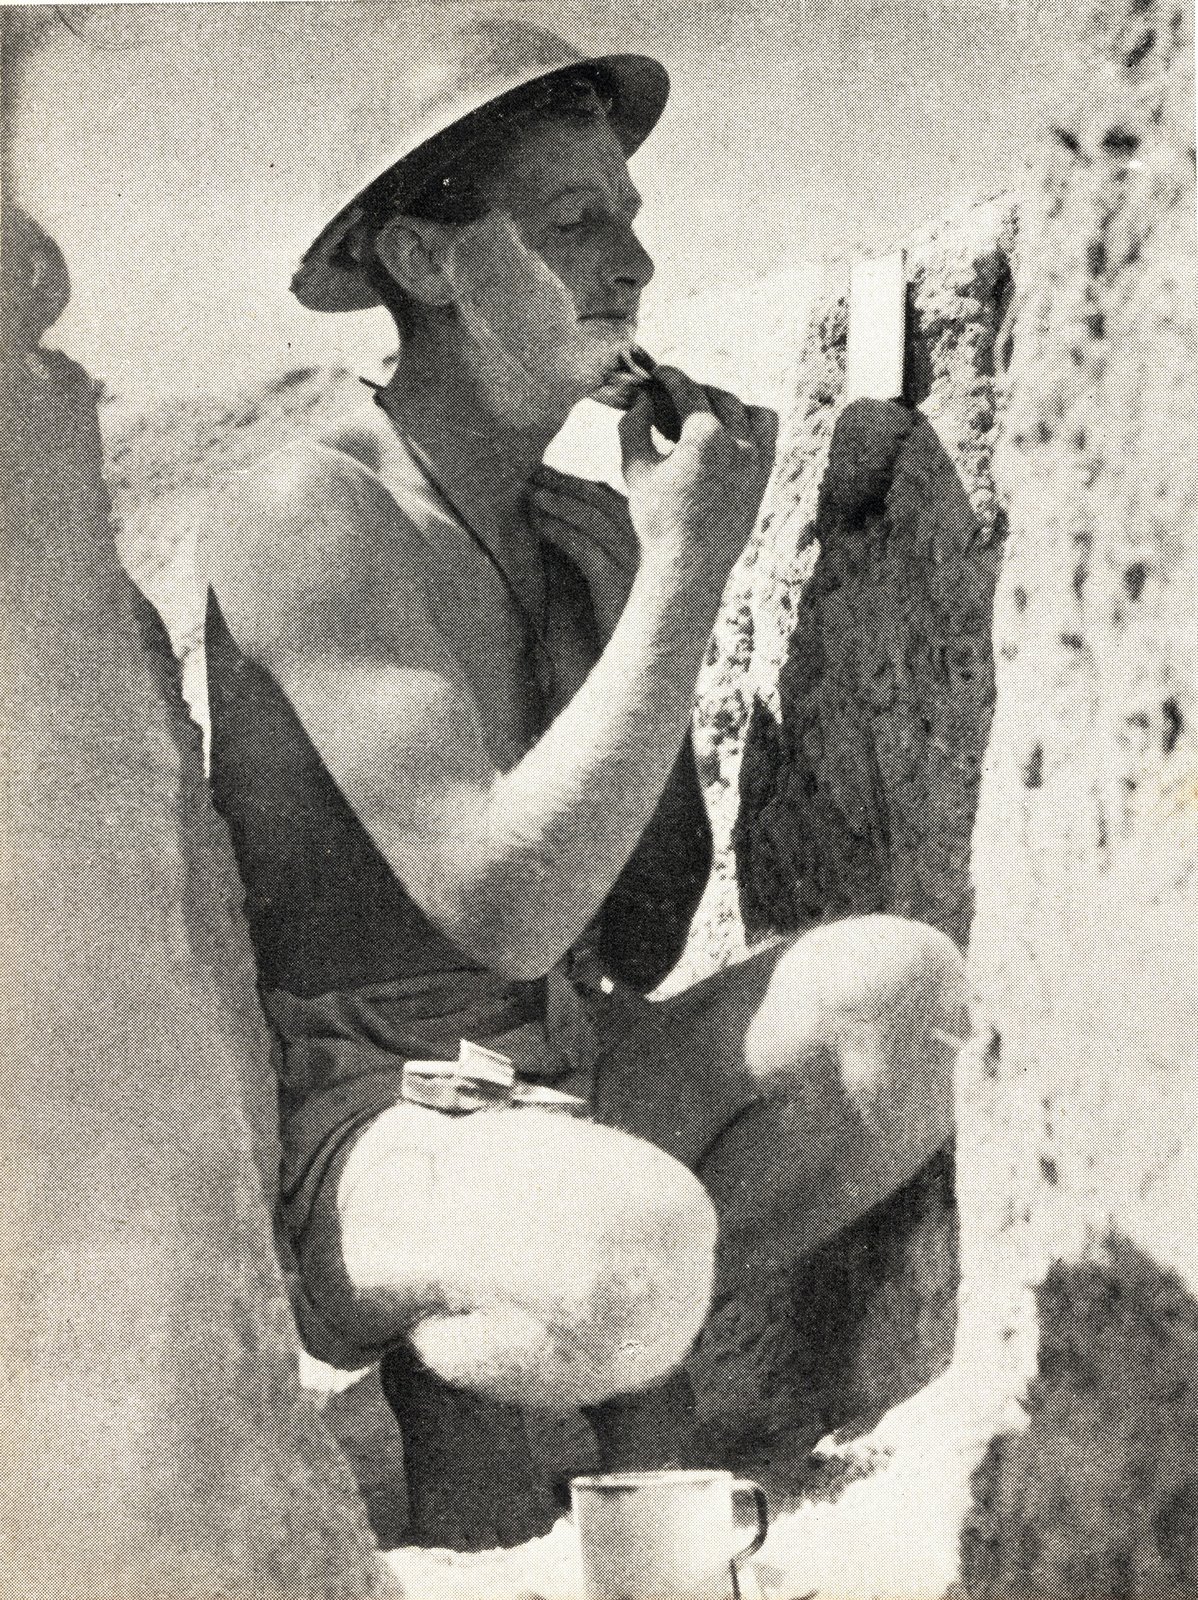
August, 1941. Tobruk, Libya.

A Rat in a Red Line hole.

Pvt. J. Collins escapes from German shelling in his doover. Pvt. Collins has been able to scrounge wood and metal to brace the walls and roof of his hole in the ground. Men spent incredible lengths of time laying about in holes just like these. It was not uncommon to have to lie in your slit trench all day in blistering heat with little water, having to relieve yourself in a old fruit tin, any movement above the surface would draw the fire of the Germans.

Pvt. Collins has letters from home in the rafters of his shelter. This is obviously a more long term doover, as one would construct during an extended period in the front lines. This photo was taken during a German artillery attack on Red Line positions. This would keep the Diggers underground for extended periods in cramped, hot and dusty conditions. Depending on the time of the shelling men in the Red Line ran the risk of missing out on their one hot meal a day if the rations trucks were attacked.

image 009513 Australian War Memorial.

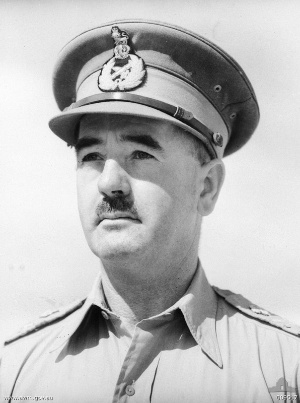
I have been unable to positively identify Pvt. J Collins as there were 217 men with that name that served in the Army during WW2. If time permits in the future I will attempt to make a positive identification.

Monday, September 1, 2008

[Image] 25 Pounder at the Australian War Memorial

August, 2008. Australian War Memorial

The 25 Pounder Heavy Field Gun.

A British 25 Pounder Heavy Artillery piece is as returned from service with the 9th Division in the Western Desert Campaign. This actual gun was used during the Battle of El Alamein in the attack that stopped Rommel's final drive across North Africa and is on public display at the Australian War Memorial at Canberra, Australia.

It sits on a heavy steel base plate that acts as a means with which to anchor and turn the gun on uneven ground, like the sand or rock of the Western Desert. It fires the standard commonwealth High Explosive charge but was also capable of firing Armour Piercing, Chemical, Smoke and Flare rounds. This gun is said by many to be the best artillery piece of the Second World War, though there are just as many supporters of the German 88mm.

The 25 Pounder was the standard artillery piece of both the Royal Australian Artillery as well as the Royal Horse Artillery, the British Artillery Regiment, that aided the Australian Infantry with the defence of Tobruk during the siege by the Afrika Korps in 1941.

Several of these guns, along with countless crates of ammunition, were captured by the Germans at Mersa Matruh in Rommel's rapid advance towards Alexandria in 1942. These same guns were turned upon the 2/48th Infantry Battalion during the Battle of El Alamein with devastating effect. The 2/48th retook the guns within a short period of time and again set them upon the fleeing Germans.

All accounts from Tobruk that I have read all say that without the support of the Royal Horse Artillery the Siege of Tobruk would have been over very quickly. Tobruk was the perfect example of Australian Infantry and British Cavalry and Artillery working as one cohesive unit.

image courtesy of Robert Snewin. Used with permission.

This post is a direct reponse to the question asked by Douglas Chan who wanted to know what were the Royal Horse Artillery guns used during the Siege of Tobruk. I hope this helps Douglas. Good luck with your project!

Saturday, August 9, 2008

[Image] German shells fall at Alamein

1st November, 1942. El Alamein, Egypt.

German shells burst in 9th Division positions.

Late on the afternoon of the 1st November, 1942, Australian positions at Alamein came under shell fire from German artillery. A shell explodes behind a large 9th Division truck. A lone digger can be seen running for the cover of the dug out in between the two trucks to the right of picture. This explosion is huge when compared to the size of the trucks in the foreground. This is not a barrage to be caught out in the open in.

image 042082 Australian War Memorial.

Saturday, August 2, 2008

[Image] Explosive End Vol. 3

Egypt, 1942.

A M3 Grant Tank falls victim to the "dreaded 88".

An unidentified Sgt. of the 2/3rd Anti-Tank Regiment of the 9th Division photographed the explosive aftermath of the American built M3 Grant when hit at close range by the German 88mm flak 36 Anti-Aircraft Gun. With absolute certainty the entire crew of this tank would have been killed instantly.

These 88mm Guns struck fear into the allies with their devastating effect and terrorising sound when fired. They were capable of penetrating 100mm of armour at 400 yards. By the looks of the outcome on the more heavily armoured M3 this one was fired upon by an extremely close 88. In the western desert these guns were sometimes dug into the ground to create a fixed position. An example of one of these guns is shown below.


November, 1942, Libya.

A dug in German 88mm Flak 36 Anti-Tank Gun.

Australian troops inspect the much feared German 88mm flak gun. This particular gun was dug in to the sand of the Western Desert to protect the crew from shell fire from allied tanks by creating a much lower profile.

Digging the gun in allowed the crew to fire on a distant allied tank much easier as to raise the arm of the gun up high to fire on a distant target in the flat terrain of the desert meant that you were likely to be more easily targeted with return fire. A smaller profile meant you were a smaller target and therefore, in theory, much harder to hit.

For the crew of this 88, the theory was disproven as when Australian troops arrived to inspect the gun they found the entire crew buried nearby.

images p01393.010 and 040977 Australian War Memorial.

Friday, August 1, 2008

[Image] The 2/28th and the R.H.A load a captured Italian 149mm gun.


Tobruk, Libya, 18th September, 1941.

Men of the 2/28th and the Royal Horse Artillery.

This photo is a good demonstration of the resourcefulness of the Australians and English at Tobruk. The gunners of the Royal Horse Artillery (RHA) utilising infantry of the 2/28th Battalion to load a captured Italian 149mm Field Gun.

These guns whilst large were quite unreliable, as alot of the Italian equipment was found to be. Note the stone "sangar" in the foreground. These low walls of stone were what was built to shelter troops from fire when the ground was too rocky to effectively 'dig in'.

The other things of interest for me in this photo is the long lanyard attached to the gun running back to the sangar. Pulling this long cord allowed the gunners to fire the cannon from a safe distance. The unreliable nature of Italian ordinance meant that to stand near the gun when firing it could mean instant death.

The other thing that amuses me is sense of urgency in the men running away from the gun to the shelter of the sangar. They have obviously seen what happens when an Italian large caliber shell misfires. Note the physical size of the shell in the sangar in the foreground. The explosion from one of these would be devastating.

image 020652 Australian War Memorial.

[Image] Explosive End Vol 2.

El Alamein, Egypt, November, 1942.

German 88mm "flak 36" Anti-Aircraft Gun.

The dreaded "88" was one of the most feared German weapons of the Western Desert campaign. Originally designed and manufactured as an Anti-Aircraft gun the 88 was redeployed brilliantly by Rommel in North Africa as an Anti-Tank gun.

Able to penetrate 100mm of armour at over 400 yards with an armour piercing shell and with an effective range of 18,000 yards with a high explosive shell that had a timed 'airburst' effect designed to rain shrapnel or "flak" over the top of infantry positions.

These guns also had a rather distinctive sound when fired that all members of the 9th Division soon became well acquainted with. These guns accounted for devastating loses with both Armour and Infantry, especially at Alamein.

This particular one has fired it's last shell.

image 050011 Australian War Memorial.

[Map] Siege of Tobruk, 1941.

The Siege of Tobruk

Libya, 1941.

This is a map of Siege of Tobruk, as defended by the 9th Division, from April to November, 1941. You can see the both the Red and Blue lines as well as post numbers and dispositions of the Royal Horse Artillery guns.

Post R49, as discussed in the previous article "Post R49 Tobruk Explained" is located on the Red Line to the east of the El-Adem road. The locations of major battles is also shown.

Click on the image to expand it.


image from "The War, The Whores and the Afrika Korps". by NX34089 Cpl. Jack Barber, 2/17th Infantry Battalion, 1997, Kangaroo Press, Sydney.

Wednesday, July 30, 2008

[Image] 9th Division troops move From Blue to Red Line at Tobruk

Tobruk, Libya, 8th August, 1941.

9th Division troops move to relieve others in the Red Line.

This image shows unidentified troops of the Australian 9th Division moving on foot from the inner perimeter "Blue Line" to relieve others in positions in the front "Red Line" at Tobruk.

Troops coming off the front lines, where they had often been in close contact with the enemy for weeks, would fall back to take up positions in the inner defensive perimeter known as the "Blue Line". When Tobruk was originally taken from the Italians in January, 1941 by the men of the Australian 6th Division the English command wanted to set up the outer defenses in the area known as the Blue Line. Australian command argued that the outer Red Line should be the one to hold as to do so would place enemy artillery out of range of the vital supply point, Tobruk Harbour. That one decision alone could may well have changed the entire course of the war.


Had defenses been set up at the originally planned Blue Line, Rommel's artillery would have likely captured the city within days. With a deep water harbour secured Rommel could move forward with his plans to rapidly take Egypt and with it, a gateway to the rich Middle Eastern oil fields of Iraq. With unlimited supply of oil relatively close to the planned Eastern Front with Russia the whole shape of the war starts to look different.

What strikes me about this image of the Libyan desert is that fact that the landscape, if viewed through a red filter, reminds me of footage I've seen of the surface of Mars. Weird I know but those rock formations are like nothing I've seen on this planet.

image 041777 Australian War Memorial.


Sunday, July 27, 2008

[Image] Aussie Alamein Artillery Aftermath

Alamein, Egypt. 12th July, 1942.

25lb Field Guns of the 2/8th Field Regiment.

This image shows a 25 pounder field gun of the 9th Division's 2/8th Field Regiment. The aftermath of a successful shoot on Axis positions is seen by the huge mound of empty shell casings.

Whilst this image was taken during the 1st Battle of El Alamein and it wasn't until October that the largest artillery barrage of the campaign kicked off, one can only imagine how large the piles of the 'empties' were after the 2nd battle.

Large amounts of these brass casings made their way home in the form of Digger "Trench Art". Many were made into vases, ashtrays and umbrella stands for the people back home. Some were even personalised with engravings of battles fought, units served in and mates lost.

These days you can often see a decommissioned 25 Pounder Field Gun at memorials and RSL Clubs around the country. There are a few in my local area. I will see if I can photograph some of them to show you.

image 024515 Australian War Memorial.


[Image] Zero Hour: Alamein

2140Hrs 23rd October, 1942
El Alamein, Egypt.
Alamein.

Zero Hour.

The allies opened their assault on Rommel's Afrika Korps at El Alamein, Egypt at 2140hrs on the 23rd October, 1942. The commencement of hostilities occurred with the largest artillery barrage of the Western Desert campaign.

On a front of six miles, the artillery of Montgomery's 8th Army was dispersed every 23 yards. At amazing pace, the English Artillery signalled to Rommel that his assault on Egypt was going to cost much more than ever anticipated.

The Australian 9th Division was deployed in the northern sector of the Alamein battlefield opposite Rommel's Panzer Tank Divisions and substantial numbers of Afrika Korp Infantrie. The artillery was to commence a punishing creeping barrage that would move forward sweeping the way for the 9th Division on foot. These tactics caused many casualties on both sides.

All personal accounts of Zero Hour at Alamein that I have read have one thing in common. All say that those that survived it never forgot it as long as they lived.

On a personal note I remember as a child in the 1970's visiting my Grandparents at their home. On the mantle piece in their loungroom was a large brass shell casing. Hand engraved on the bottom of it was "Alamein 1942". It fascinated me, for here in my mind was a highly explosive device that may go off with the slightest noise or vibration. I think it may have been a scam perpetrated by my parents to keep my behaviour quiet while we paid a visit :) In any case when I asked my Grandfather (NX17811) about it he said "That's a Tommy 25 pounder from Alamein". He never elaborated on it and I never understood enough to ask more.


I always wondered what happened to that shell.


image 042485 Australian War Memorial.