Sunday, August 17, 2008

[Image] Crocodile Dundee of Tobruk


26th September, 1941. Tobruk, Libya.

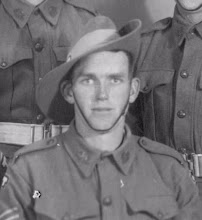
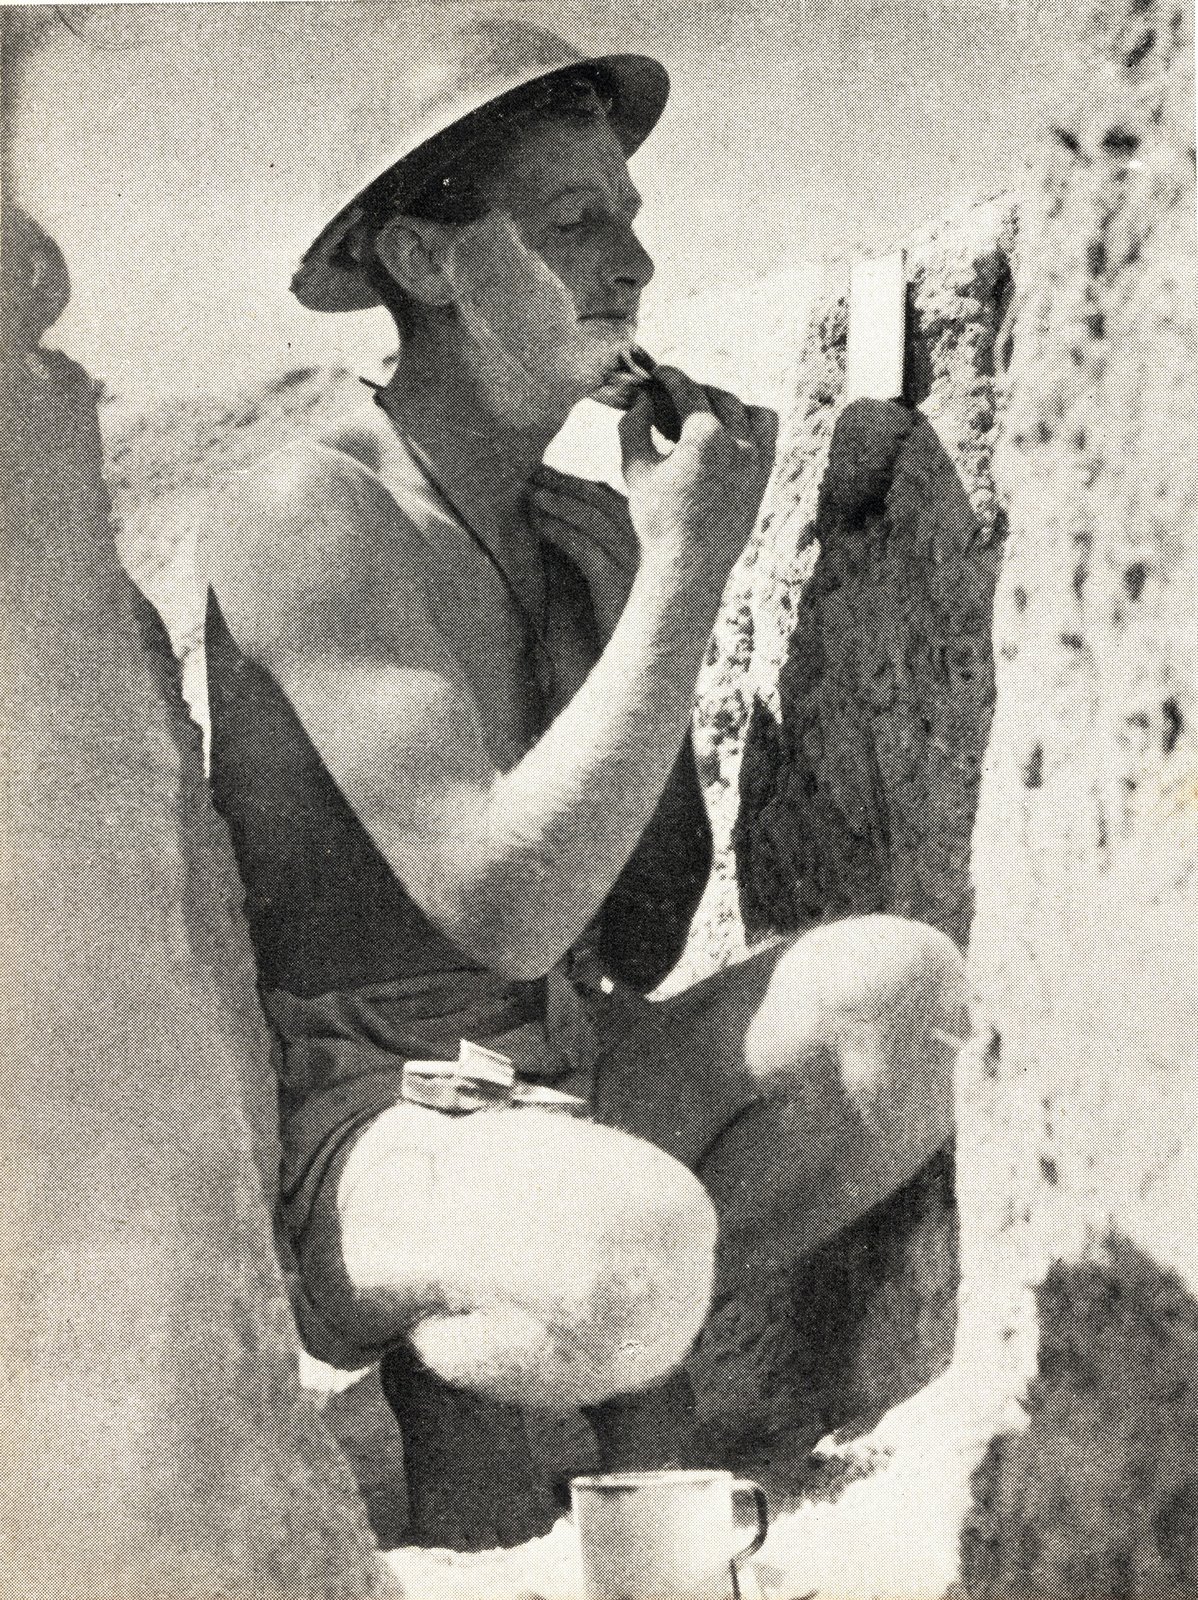
SX1417 Pvt. V.J. Fuller models the new look slouch hat

Pvt. Victor John Fuller of the 2/3rd Field Company, Royal Australian Engineers, finds a new way to accessorise with a belt of captured Italian Breda Model 37 8mm machine gun bullets making a nice hat band for his weathered slouch hat.

I think Paul Hogan has a lot of explaining to do after seeing this photo. Crocodile Dundee anyone?

image 020644 Australian War Memorial.

Saturday, August 16, 2008

[Image] Tobruk's Anti Aircraft Defenses

6th September, 1941. Tobruk, Libya.

VX24598 Bombardier E.J. Courtney MM

VX24598 Bombardier Edward James Courtney of the 2/3rd Light Anti Aircraft Regiment, attached to the 9th Division demonstrates the Italian Breda Model 35 20mm cannon that he won his Military Medal on.

His citation for the Military Medal reads;

"For bravery and devotion to his duties in an A.A. detachment whilst under heavy dive bombing and machine gun fire."

At Tobruk on 25th April and 7th May, 1941.

"1. On 25th April at Pilastrino when over forty E.A. (Enemy Aircraft) took part, the Breda gun on which Gnr Courtney was a gun number had a stoppage during the engagement. The detachment took cover, with the exception of Gnr Courtney who remained at his post working to free the stoppage in spite of heavy machine gun fire and near bomb explosions, and succeeded in getting the gun into action again and enabling to detachment to reengage the E.A."

"2. On 7th May when protecting a troop of 60-pdr. guns in another dive bombing attack, Gnr Courtney's gun again had a stoppage. He preceded to clear the stoppage despite the fact that three ME.110's were machine gunning along the ridge and several of the bullets entered the gun pit narrowly missing him while he was working. Through his efforts the gun was eventually brought back into action."

Another classic example of Australian troops using a captured Italian gun against German aircraft. If it would shoot Aussies would use it.

VX24598 Bombardier E.J. Courtney MM's entire service record has been digitised by the Australian National Archives. Find the link in the "Research Links" sidebar to the right.

image 020589 Australian War Memorial.

[Image] The RAAF drops in at Alamein.

21st September, 1942. El Alamein, Egypt.

RAAF Kittyhawk makes a forced landing.

This RAAF Kittyhawk made a forced landing in 9th Division positions at Alamein after a succesful attack run over German held territory. Unfortunately on the return run he was hit by severe anti-aircraft, or ack ack fire and was forced to make a rather skillful forced landing. This plane would have been rapidly salvaged, repaired and put back into service.

My mate Terry is currently restoring a 26 litre supercharged V12 Allison Engine out of one of these planes. I bet his neighbours can't wait for it to kick over for the first time.

image 013279 Australian War Memorial.

[Image] German War Graves at Alamein

September 1942, El Alamein, Egypt.

German War Graves found inside Australian positions.

When the Germans attacked 9th Division positions in September 1942 at Alamein they took a portion of the Australian minefield and held it for a number of days until a counter attack dislodged them.

During this time the Germans buried a number of their dead that had fallen in the no mans land between forward positions. Both sides buried each others dead if it was safe to do so. The men who occupy these graves were buried during this brief period. The Germans brought with them a supply of ready made wooden crosses in anticipation of having to perform this task.

An unidentified Tommy Gunner of the 9th Division looks on at the final resting place of the men who were his enemy.

image 042007 Australian War Memorial.
[Image] Death of a Stuka

1941. Tobruk, Libya.

One less Stuka in the parade.

For troops in Tobruk, the daily raids by the German Stuka dive bombers on their harbour and artillery positions became known as "The Stuka Parade". Often these planes would descend on their targets at incredibly steep angles with large payloads of bombs. Sirens attached to the planes would scream the faster they dived in an attempt to demoralise the opponent.

Once their bombs were released they often flew out towards the El-Adem area to circle around below the line of the escarpment held by the German's in safety to return to strafe the Australian positions holding the red line. It became almost like a game with the same planes flying over the same positions each day at the same time often at altitudes of little more than 100 feet.

This particular Stuka flew a little too close to the Red Line and was brought down. Wrecks like this were often stripped by Australian souvenir hunters. You can see that someone has cut the swastika out of the aluminium of the tailplane. These were often the first thing to go as they were light and could be mailed to unsuspecting relatives back home. There is very little of value left on this plane.

image 040612 Australian War Memorial.
[Image] The Crusader Tank

10th July, 1942. El Alamein, Egypt.

The 9th Division's Cavalry Regiment's Crusader Tank.

Meet the Crusader. This is the best that the British had to counter the German's Panzers. Whilst faster than the Panzer, the Crusader was lacking in every other department. It had less armour, a much smaller two pounder gun and was plagued by mechanical problems.

It also had the severe tactical disadvantage of not having a High Explosive shell for it's main gun. Whilst these shells existed they were not made available in time. Realising the severe disadvantage that they faced with their lack of armour these tanks were replaced later in 1942 by the American built Shermans and Grants which were much more capable of taking on the Panzer's of the Afrika Korps on a much more even footing. The Crusader finished the War in a support role and was more often used as an artillery tractor.

image 024483 Australian War Memorial.
Friday, August 15, 2008

[Image] The Hessian Spitfire of Tobruk


23rd September, 1941. Tobruk, Libya.

9th Division Sappers show off their hessian Spitfire.

Engineers from the 9th Division proudly display one of their latest achievements. A dummy Spitfire made from wood and hessian. Whilst boredom was a major obstacle of the Australian soldier in Tobruk, this display of modelling did have a military application.

The German's relied heavily on aerial reconnaissance of the Allied positions at Tobruk, with even Rommel himself known to fly his Storch occasionally for a personal view of the battlefield. With Allied aircraft numbers rapidly dwindling in the Western Desert with each sortie and the Luftwaffe possessing unprecedented air superiority a need for deception was required. Australian Sappers built these dummy aircraft to fool German reconnaissance pilots into thinking that Tobruk possessed a higher number of serviceable fighter planes than they actually did. They also served the added purpose of drawing Luftwaffe bombs away from actual planes, thus increasing their survival chances.

This campaign of deception was used again to great effect by Montgomery at Alamein where the widespread use of dummy troop trucks and tanks gave the Germans an inflated estimate the the Allied numbers that they were facing.

image 020685 Australian War Memorial.
Thursday, August 14, 2008

[Image] The business end of the Panzer Mk IV.

El Alamein, Egypt, 1942.

The business end of a Panzer Mk IV.

This amazing photo was taken by a member of the 9th Division at Alamein in 1942. This tank is the Panzerkampfwagen MkIV, or more commonly known as the Panzer MkIV. The MkIV was a masterpiece of German engineering. It was heavily armed and armoured and with the main 75mm gun it could deliver devastating firepower quickly.

In the Western Desert campaign there was initially very little in the allied arsenal that could cause the MkIV any concern. It had 100mm thick armour that could withstand almost anything fired at it. Unfortunately for this Panzer and it's crew the troops that disabled this war machine targeted the most vulnerable part of the German tank, it's tracks. Whilst there was very little that could penetrate it's armour there was however, a number of weapons that were capable of disabling the tracks. This particular tank carries a number of sections of spare track mounted across the front of the armour plate. A machine gun (likely an MG42) is turret mounted in a forward hard point. The salvage division vultures would soon be there to take it away for further use against Axis forces.

It was tanks such as these that first probed the 9th Division's positions along the El-Adem road during the Easter Battle of 1941 at Tobruk. Around 20 tanks, including some MkIV's, approached the lines of the 2/17th Battalion and stopped approximately 30 yards from the Aussies in the defensive posts. The above photo, whist taken at Alamein and disabled, still for me conjures up a horrifying image of what it must have been like for men like my Grandfather who were the first Australians to engage the tanks of the Panzer Divisions. It was also these same men, in this same battle, that gave the allies their first ever victory over the Germans on land.

It is not a fact widely known that Australian troops of the 9th Division were the first allied troops to defeat the Germans in battle on land. The Easter Battle of 1941 at Tobruk was the first time the allies had repulsed a German attack in the war to date. The motto of the 2/17th Infantry Battalion is "What we have, we hold". On this occasion just like the many more to follow, the 2/17th held their ground and won a decisive victory against superior numbers and equipment.

image p04734.011 Australian War Memorial.

[Image] Captured German mortar is stamped "Return to Sender"


Tobruk, Libya. 15th September, 1941.

The German 50mm Mortar.

This unidentified member of the 9th Division Salvage Unit demonstrates how easy it is to fire a captured German 50mm mortar. Equipment like this was invaluable to the Australians as at the time they occupied Tobruk, they were short of many items, especially weapons.

This 50mm Mortar was designed for use by infantry units. Ideally it would be operated by a crew of two. One to aim and steady the weapon, the other to fire it. Even with it's base plate it was still man portable. The High Explosive shells had an approximate rage of 500 yards and each shell weighed about 2.25lbs (approx 1kg). Many such mortars occupied the area known as "the salient" and they had a distinctive 'whoosh' sound when fired. Troops in forward posts would hear the sound of the mortar firing and would literally have a matter of seconds to take cover. In open ground these weapons can be devastating on soft targets like infantry.

The 9th Division's Salvage Unit was one of the most important units of the western desert campaign. Up until Alamein, the 9th Division was predominantly under equipped and poorly armed. Making use of captured enemy weapons and equipment soon became a necessity. The 9th Division Salvage Unit would be like ants at a picnic. Anything that could be salvaged from the battlefield and repaired, reused or recycled would be devoured and put back into the hands of the 9th Division's troops to use against their former owners. The Australian ability to scrounge and salvage was legendary.

image 020752 Australian War Memorial.